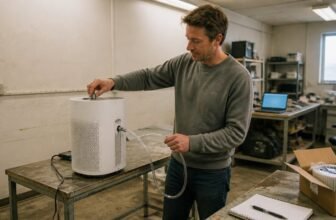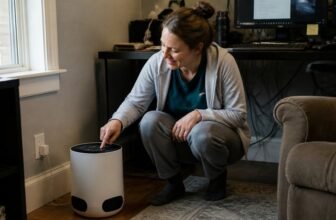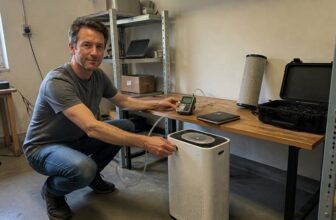
A red light that stays on usually means a dirty sensor, not dangerous air. This lens gets coated with dust, much like a smudged window, so cleaning it is your first step.
You can wipe the small vented flap with a dry cotton swab, then run the fan for ten minutes. If the light remains, unplug the unit for sixty seconds before trying anything else.
This article covers sensor cleaning and basic troubleshooting for a persistent red indicator. A clean sensor keeps your purifier accurate, so choose a model with easy access to this part for simpler upkeep.
Air Purify Highlights
- A dirty particle sensor usually causes the red light, not bad air in the room.
- Unplug the unit and power it off before you touch the sensor lens.
- Wipe the lens with a dry cotton swab, then dampen it for stubborn grime.
- Let the sensor air dry for a few minutes before closing anything up.
- Run manual mode for 10 minutes, then unplug 60 seconds and restart it.
Why Your Coway Airmega Red Light Is Stuck on Polluted

A red light on your Coway Airmega that stays on means the machine still detects polluted air, even if the room looks clean. The usual cause is a dirty particle sensor, not a lingering cloud of contaminants.
These small lenses measure particulate matter and become clogged with dust over time, similar to a dirty windshield that blocks your view. Regular cleaning of the sensor with a cotton swab extends its lifespan and avoids a costly replacement.
Check your warranty coverage before paying for repairs, as some plans include sensor parts but not labor. A quick swab is cheaper and faster than a service visit, so start with that simple maintenance step.
How to Find the Sensor Cover on Your Specific Model
The sensor cover sits on the right side of the unit or behind the front shell, depending on your model. On the AP-1512HHS and 200M, the small vented flap is low on the right panel and pops off with a fingernail. The 400/400S and 300/300S require lifting the front cover upward first to reach the sensor.
Removal needs no tools or screws; pinch the tabs and slide the cover off. Model variations shift the exact spot, so consult your manual’s diagram if you cannot locate it.
A small grill on the right or behind the front shell is your target. Open it to find the lens ready for a wipe.
The Safe Way to Clean the Sensor (No Tools Required)
Clean the sensor without tools by wiping it with a dry cotton swab after powering down and unplugging the unit. For stubborn grime, dampen one end of the swab slightly, then follow with a dry swab to soak up residue.
Locate the small cover, pop it open, and wipe the lens directly, avoiding sprays or disassembly. After wiping, let the sensor dry naturally for a few minutes before closing the cover and plugging the unit back in.
Perform this upkeep every two months to keep the sensor functioning properly and prevent the red light from staying on. If dust accumulates quickly in your space, clean monthly, since a cheap swab protects you from a costly repair.
Why the Red Light Persists After Cleaning (And How to Fix It)
That stubborn red light often persists because the sensor needs a diagnostic cycle to recalibrate after cleaning, not because the filter is faulty. Dust trapped inside the lens housing can also cause false pollution readings, keeping the red glow active.
Run a manual mode for 10 minutes to blow out residual particulates, then unplug the unit for 60 seconds and restart it to trigger a fresh diagnostic cycle. Perform a factory reset via the control panel, checking your model’s manual for the exact button combination.
Make certain the sensor cover snaps back fully, as a loose fit lets stray dust confuse the reading. If the red light shifts to blue after these steps, the recalibration worked; if not, the sensor likely needs deeper professional attention.
When to Call Support or Replace the Sensor
When the red light stays on after a manual mode blowout and a full power cycle, the sensor is likely faulty. A faulty sensor is worse than no sensor because it gives false readings, so you need to fix or replace it.
Check warranty coverage first, since most units include a one year parts warranty on the sensor. A dead sensor may be repaired at no cost if the unit is under 12 months old.
- Sensor lens visibly cracked: replace it, cost estimate $30 to $60
- Red light flickers randomly: call support, likely free under warranty
- Still red after 3 cleanings: replace the sensor, cost estimate $40 to $80
- Unit under 12 months old: claim warranty, no cost
- Unit older than 2 years: replace the sensor, about $50
Replacing a sensor is straightforward with a screwdriver, and the part costs $40 to $80 online. If you are past warranty and unsure, call support to confirm whether the issue is the sensor or the circuit board.
A sensor that lies about air quality undermines the purpose of the purifier, so do not leave it unresolved. Fix the sensor promptly to keep the unit reporting accurate filter replacement and air quality status.
Frequently Asked Questions
Can Dirty Filters Cause a False Red Light?
Dirty filters alone typically do not trigger a false red light, since the indicator reads sensor data rather than filter state. However, heavily clogged filters can alter airflow and particle readings over time, which may skew what the sensor reports.
Accumulated dust on internal components can interfere with the particle sensor’s accuracy. Regular prefilter cleaning and timely filter replacement keep sensor readings reliable, so a red light stays tied to real air quality events. If the light persists after cleaning, check the manufacturer’s maintenance guide.
How Often Should I Replace the Dust Sensor?
Dust sensors typically do not need scheduled replacement, because their lifespan is long and indefinite with normal use. Cleaning every two months is the primary maintenance task that keeps readings accurate, not swapping out the sensor.
Dirt and debris can block the sensor’s airflow over time, even if the filter is fresh. Focus on the cleaning schedule and follow the manufacturer’s instructions for the exact method, since improper cleaning can damage the sensor.
Will Unplugging the Unit Reset the Sensor?
Unplugging the unit does not reset the dust sensor. Power removal only stops the fan and airflow, it does not clear the accumulated particulate contamination on the optical components.
The sensor requires manual cleaning to restore accurate readings. Follow the manufacturer’s instructions for accessing and wiping the sensor lens and chamber. Dust buildup, not a power cycle, is what affects sensor performance.
Does High Humidity Affect the Air Quality Reading?
Yes, humidity can interfere with the reading. Damp condensation on the sensor lens mimics particulate matter, creating a ghost signal. This false reading can trigger a persistent red light that masks the room’s true air quality.
The effect is temporary and typically fades as the sensor dries out. If the issue recurs, place the purifier away from direct sources of steam, like a humidifier outlet. Drier air around the sensor helps maintain accurate readings. Automatic mode may respond poorly to these false signals, so consider running the unit on a fixed fan speed during humid periods.
Can Pet Hair Permanently Damage the Sensor Lens?
Pet hair typically does not permanently damage the sensor lens, so you do not need to worry about the hardware itself. Hair accumulation can block the sensor chamber and obstruct the laser, which leads to unreliable air quality readings.
Regular cleaning of the sensor inlet prevents this buildup and keeps detection accurate. Gently wipe the lens area with a dry, soft cloth during routine maintenance. For any internal cleaning, follow the manufacturer’s instructions to avoid harming the sensor.
Rounding Up
Start with the sensor cleaning you have already done, and if the red light still stays on, check the manufacturer’s instructions for the sensor cover and filter access panel. This action applies when the unit has run for several months or the filter is visibly dirty, but if the light persists after a fresh filter and a thorough wipe, the sensor wiring may be the cause. For any cleaning or electrical issue, follow the manual’s guidance on opening the unit and handling parts safely. Let the final condition be whether the light resets after a full power cycle, since that determines if the sensor needs further attention or a service call.